
| Disclosure: This article may contain affiliate links. This means I get a commission if you decide to make a purchase through my links, at no cost to you. |
A few years ago, we decided to embrace injection molding as the primary method of manufacturing in the shop. Since then, we’ve been asked how we go about injection molding our custom weapons many times.
We often get questions like, “Which CNC machine do you guys use?” Or, we also get the occasional “How do you make the aluminum molds?” “Which software do you guys use?” “Any brand you recommend for end mills?”
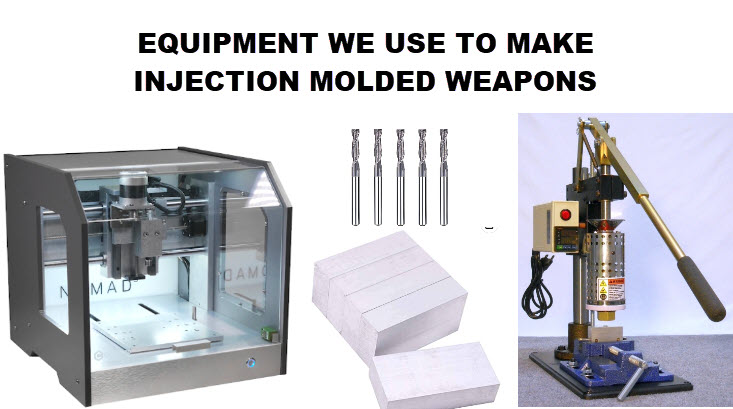
Well, the time has finally come. In this article, I will share the equipment we use in the shop to make the custom 112 weapons we sell. This article is not a tutorial (that will come later). But you can get an idea of what you’ll need to start injection molding on your own.
Let’s dive right in.
# 1 – CNC Machine
We are proud to say that the CNC machine we use in the shop is the NOMAD 3 CNC Machine from Carbide 3D. The NOMAD 3 is a beast! And when it comes to cutting aluminum stock, it plows through it with ease.
One of the features I admire about the NOMAD 3 is its compact design. With a 20-inch by 20-inch footprint, it sits quietly on top of the workbench in the shop. And it just sits there patiently, taunting us when we will send it the next job.
Another feature I really like is the embedded enclosure. Although it doesn’t make the cutting operation entirely soundproof, it helps cut it down. And not only that, but it also helps keep the aluminum chips from getting everywhere in the shop.
And speaking of “making chips,” the NOMAD 3 does not require any cooling agent when cutting aluminum. I believe this is also true when trying to mill other alloys. Although I’m not sure how safe this is for the machine or your end mills, let me tell you, we’ve been cutting aluminum without any cooling for 2 years and have not had any issues.
If you’re one of those who needs to know the technical specs, here they are:
- Spindle RPM – 9,000 to 24,000
- Spindle Motor – 130W
- Input Voltage – 110V or 220V
- Outer Dimension – 17.5″ (W), 19″ (D), 17″ (H)
- Cutting Area – 8″ (X-Axis), 8″ (Y-Axis), 3″ (Z-Axis)
- Spindle collet – ER-11, 7mm max cutter diameter
Visit the NOMAD 3 web page from MatterHackers here for more information.
The NOMAD 3 CNC machine has been a part of our manufacturing process for the last 2 years. And it continues to prove itself as a vital tool in the shop. Since we switched over to injection molding, all the aluminum molds for the custom weapons we sell on our eBay store were machined by the NOMAD.
The NOMAD 3 comes equipped with tools and software that make the user experience a delight.
First, its automatic tool length measurement feature makes it easier to measure the actual length of the endmill you will use before each cut. With a few simple clicks on the included Carbide Motion software, the NOMAD 3 performs all the measuring independently.
Second, the BitZero V2 apparatus (included when you purchase the NOMAD 3) makes finding your stock’s “zero” location a breeze. Finding your stock’s “zero” site is crucial to getting accurate cuts. And when making molds for injection molding, accuracy is essential because you need to ensure that the two halves of the mold will line up perfectly.
With BitZero V2, you simply place the apparatus on one of the corners of your stock, follow the directions on the Carbide Motion interface, and click a button to start the probing operation. Once again, the NOMAD 3 does all this on its own and automatically finds your stock’s “zero” location.
Third, the bundled MeshCAM software makes it easy to prepare your 3D model for CNC machining. MeshCAM is really easy to use. You can get the GCODE necessary to run the toolpath that the NOMAD 3 needs to cut your aluminum stock with minimal input and effort.
MeshCAM is a delight to use. Like its creators say on their website, “MeshCAM is made for people who just want to make parts now.” For us, this statement is VERY accurate! Something else much simpler will have to come along before I can be convinced to switch to another CAM software.
Because it is easy to use, I was able to make our first Aluminum mold within the first day of the machine arriving in our shop. For a newbie in CNC machining like me, this was a VERY PLEASANT experience. And I have a pretty good feeling that we will be using it in the MAD shop for years to come.
# 2 – End Mills
Regardless of the CNC Machine, you will need end mills to do the actual cutting of the aluminum stock. In the MAD shop, we use the end mills from SpeTools.
I’m sure other brands are available that are considered more “high-end.” For us, however, end mills from SpeTools are more than enough for what we need. When it comes to cutting aluminum stock to make injection molds, end mills from SpeTools do a WONDERFUL job.
The cuts are always clean and don’t leave burrs on the surface. They also last for some time before needing a replacement. In the shop, we go through about 3 or 4 sets of molds (6 to 8 pieces of stock) before needing to replace the end mill.
Since the NOMAD 3 CNC Machine has a 0.125″ collet, we always purchase end mills from SpeTools with a 0.125″ shank. Below are the different sizes we keep in stock in the MAD shop.
- 1/8″ Shank, 1/8″ Square End 2-Flute End Mill
- 1/8″ Shank, 1/8″ Ball End 2-Flute End Mill
- 1/8″ Shank, 1/16″ Square End 2-Flute End Mill
- 1/8″ Shank, 1/16″ Ball End 2-Flute End Mill
- 1/8″ Shank, 1/32″ Square End 2-Flute End Mill
- 1/8″ Shank, 1/32″ Ball End 2-Flute End Mill
And here’s the best part, in my opinion. Each set comes with 5 pieces!
Yup, you get FIVE end mills per set! For around $30 per set, you get more than what you pay for. It is an excellent value without sacrificing quality.
We also keep in stock some “tapered-ball” end mills. But those are reserved for weapons that require milling in very tight spaces that the 0.032″ end mill cannot get into. If you happen to have any requirements for those, I recommend searching on Amazon. I would like to recommend the ones we use in the shop, but we haven’t used them enough to justify a recommendation.
If you’re wondering about the feeds and speeds we use for the SpeTools end mills, I’ve listed them below for each of the sizes mentioned above. Please keep in mind that these are the configurations we use that work for us. We are NOT responsible for any damages and/or injuries that may occur.
0.125″ (Both SQUARE and BALL end)
- Feedrate – 10.0
- Plunge Rate – 1.0
- RPM – 16,000
- Stepover % – 30
- Step Down – 0.02
0.062″ (Both SQUARE and BALL end)
- Feedrate – 5.0
- Plunge Rate – 0.8
- RPM – 16,000
- Stepover % – 20
- Step Down – 0.0125
0.032″ (Both SQUARE and BALL end)
- Feedrate – 2.6
- Plunge Rate – 0.4
- RPM – 16,000
- Stepover % – 20
- Step Down – 0.0064
If you want a smoother surface finish, try adjusting the Stepover% value to something smaller. This works really well for us but also takes much longer to mill. We’ve gone down as low as 3% for some of the milled weapons that needed smooth surfaces.
So, now we’ve gone over the CNC machine and the end mills. It’s time to introduce where we buy our alloys that eventually become our molds.
# 3 – Aluminum Stock
Depending on workload and how soon we need to get a particular weapon made, we have different sources from which we get our aluminum stock.
Suppose, for example, we are in no rush. In that case, we order some flat rectangular 6061 Aluminum bars from Speedy Metals, pre-cut to the specific size we need. If you’re buying in bulk, this is the way to go because they are incredibly inexpensive!
We typically keep different sizes in stock, so we don’t run out of aluminum bars. And when we place an order from Speedy Metals, we usually order around 30 pieces and pay around $160 (plus the shipping cost). Thirty pieces are enough for 15 sets of molds.
Although a great deal in price, getting the aluminum bars set up for milling will require more work. Since the bars are extruded from the manufacturer, they will not be perfectly flat or have accurate dimensions. So, you will be required to “square off” the stock and mill it to size. And yes, this is necessary for both sides of the mold!
So, before you can even mill the mold cavities, you must square off and flatten the pieces first. For injection molding, both mold halves need to be perfectly flat. If not, plastic can seep through, and you can have “flashing” on the injection-molded part.
If, on the other hand, we don’t have much time, we may place an order from private vendors who sells “blank” aluminum injection molds. An example of such can be found from LNS Technologies here.
With these blank aluminum injection molds, the two halves are already milled to be flat and squared off for the perfect Dimension and size. Also, most will already have alignment pins installed to help you align the two halves together.
However, as you may already know, it will come at a price. At the time of this writing, the blank aluminum molds from LNS Technologies are around $120 per set. Although it may seem like a lot, the value we get from it is time we save! And for us, the $120 pay stub is still way better than getting a manufacturing company to make the mold for us!
If you’re interested in the story of how much we would’ve had to pay to get a mold made by a manufacturing company, you can read it here.
# 4 – Injection Molding Machine
We use the PIM 150A Benchtop Injection Molding Machine from LNS Technologies for our injection molding machines. It’s a superb machine, and I could not have been happier buying 2 of these for our shop. We’ve been using them since we first opened for business, and we will continue to use them for many more years to come.
The PIM 150A is sturdy and doesn’t require much space in the shop. The components are well built, and everything about it says “high quality.”
One of the best features, in my opinion, is its MAX operating temperature of 500 degrees F.. Because of this, resins with higher melting points are no problem for the 150A. It gives us the flexibility to use something like ABS plastic (the required temperature is around 480 – 490 F) if we ever need to.
Another great feature, in my opinion, is the modular design for the barrel and clamp contraptions. Both are interchangeable and can be swapped out in a few minutes. For example, when we injection-mold our Custom 1:12 Modern 9mm Pistols, we remove the original vice clamp and replace it with the “Quick-Release Toggle Clamp.”
Since the mold is small, the toggle clamp is perfect. And it speeds our injection molding process 2 times faster. We can do 4 injection cycles in 1 minute using the toggle clamp. However, we average about 2 cycles per minute with the stock vice clamp.
The modular design on the barrel assembly helps us save time by avoiding the need to purge the previous materials when changing resins. We do this a lot in the shop because we use different thermoplastic materials. For example, we use TPE or TPV “flexible” plastic when making our Custom 1/12 Tactical Ammo Pouch Belt.
As we continue to expand the selection of accessories in our inventory, we plan to purchase more barrel assemblies for LNS. It may be inevitable that we will have one spare barrel for each type of material and for each color we have in stock.
CONCLUSION
So, there you have it. Now you have an idea of what we use in the shop to make our injection molded custom 1:12 scale weapons.
If you have any questions or concerns, send me a message. That’s it for now and until next time.
GOD Bless!